
How to Organize Your Photos - Step One

A few of the old photos we've inherited from family. Priceless!!
We’ve been parents for a year now, and one thing that everyone can agree with is the passing of time and how quickly it passes! If time is going by this quickly, how in the world can we keep up with the millions of pictures we take?! Not to mention, don’t you miss the days of photo albums? Whenever we visit my grandmother's or Sam’s parents, one thing I love to do is sit down and peruse the albums. As Ester grows, surely she’ll enjoy albums as well. But with all of the photos sitting on hard drives, there won’t be any albums for us to pass along to her!
We made it our goal to clean things up! And before we even attempted the digital photos we began with the hard copies.

My mom at one year old; she looks so much like Ester!
This simple process only took a few hours…
What you need::
- Ziploc Quart or Gallon Sized Bags
- Pen or Marker
- 3x5 Notecards
Gather all the printed photos you have (or all of the ones you can access (some may be up in the attic). Begin grouping the photos by relative decade, do the best you can.
Look at the fashion, the location, and if you have family around maybe ask for a few pointers.
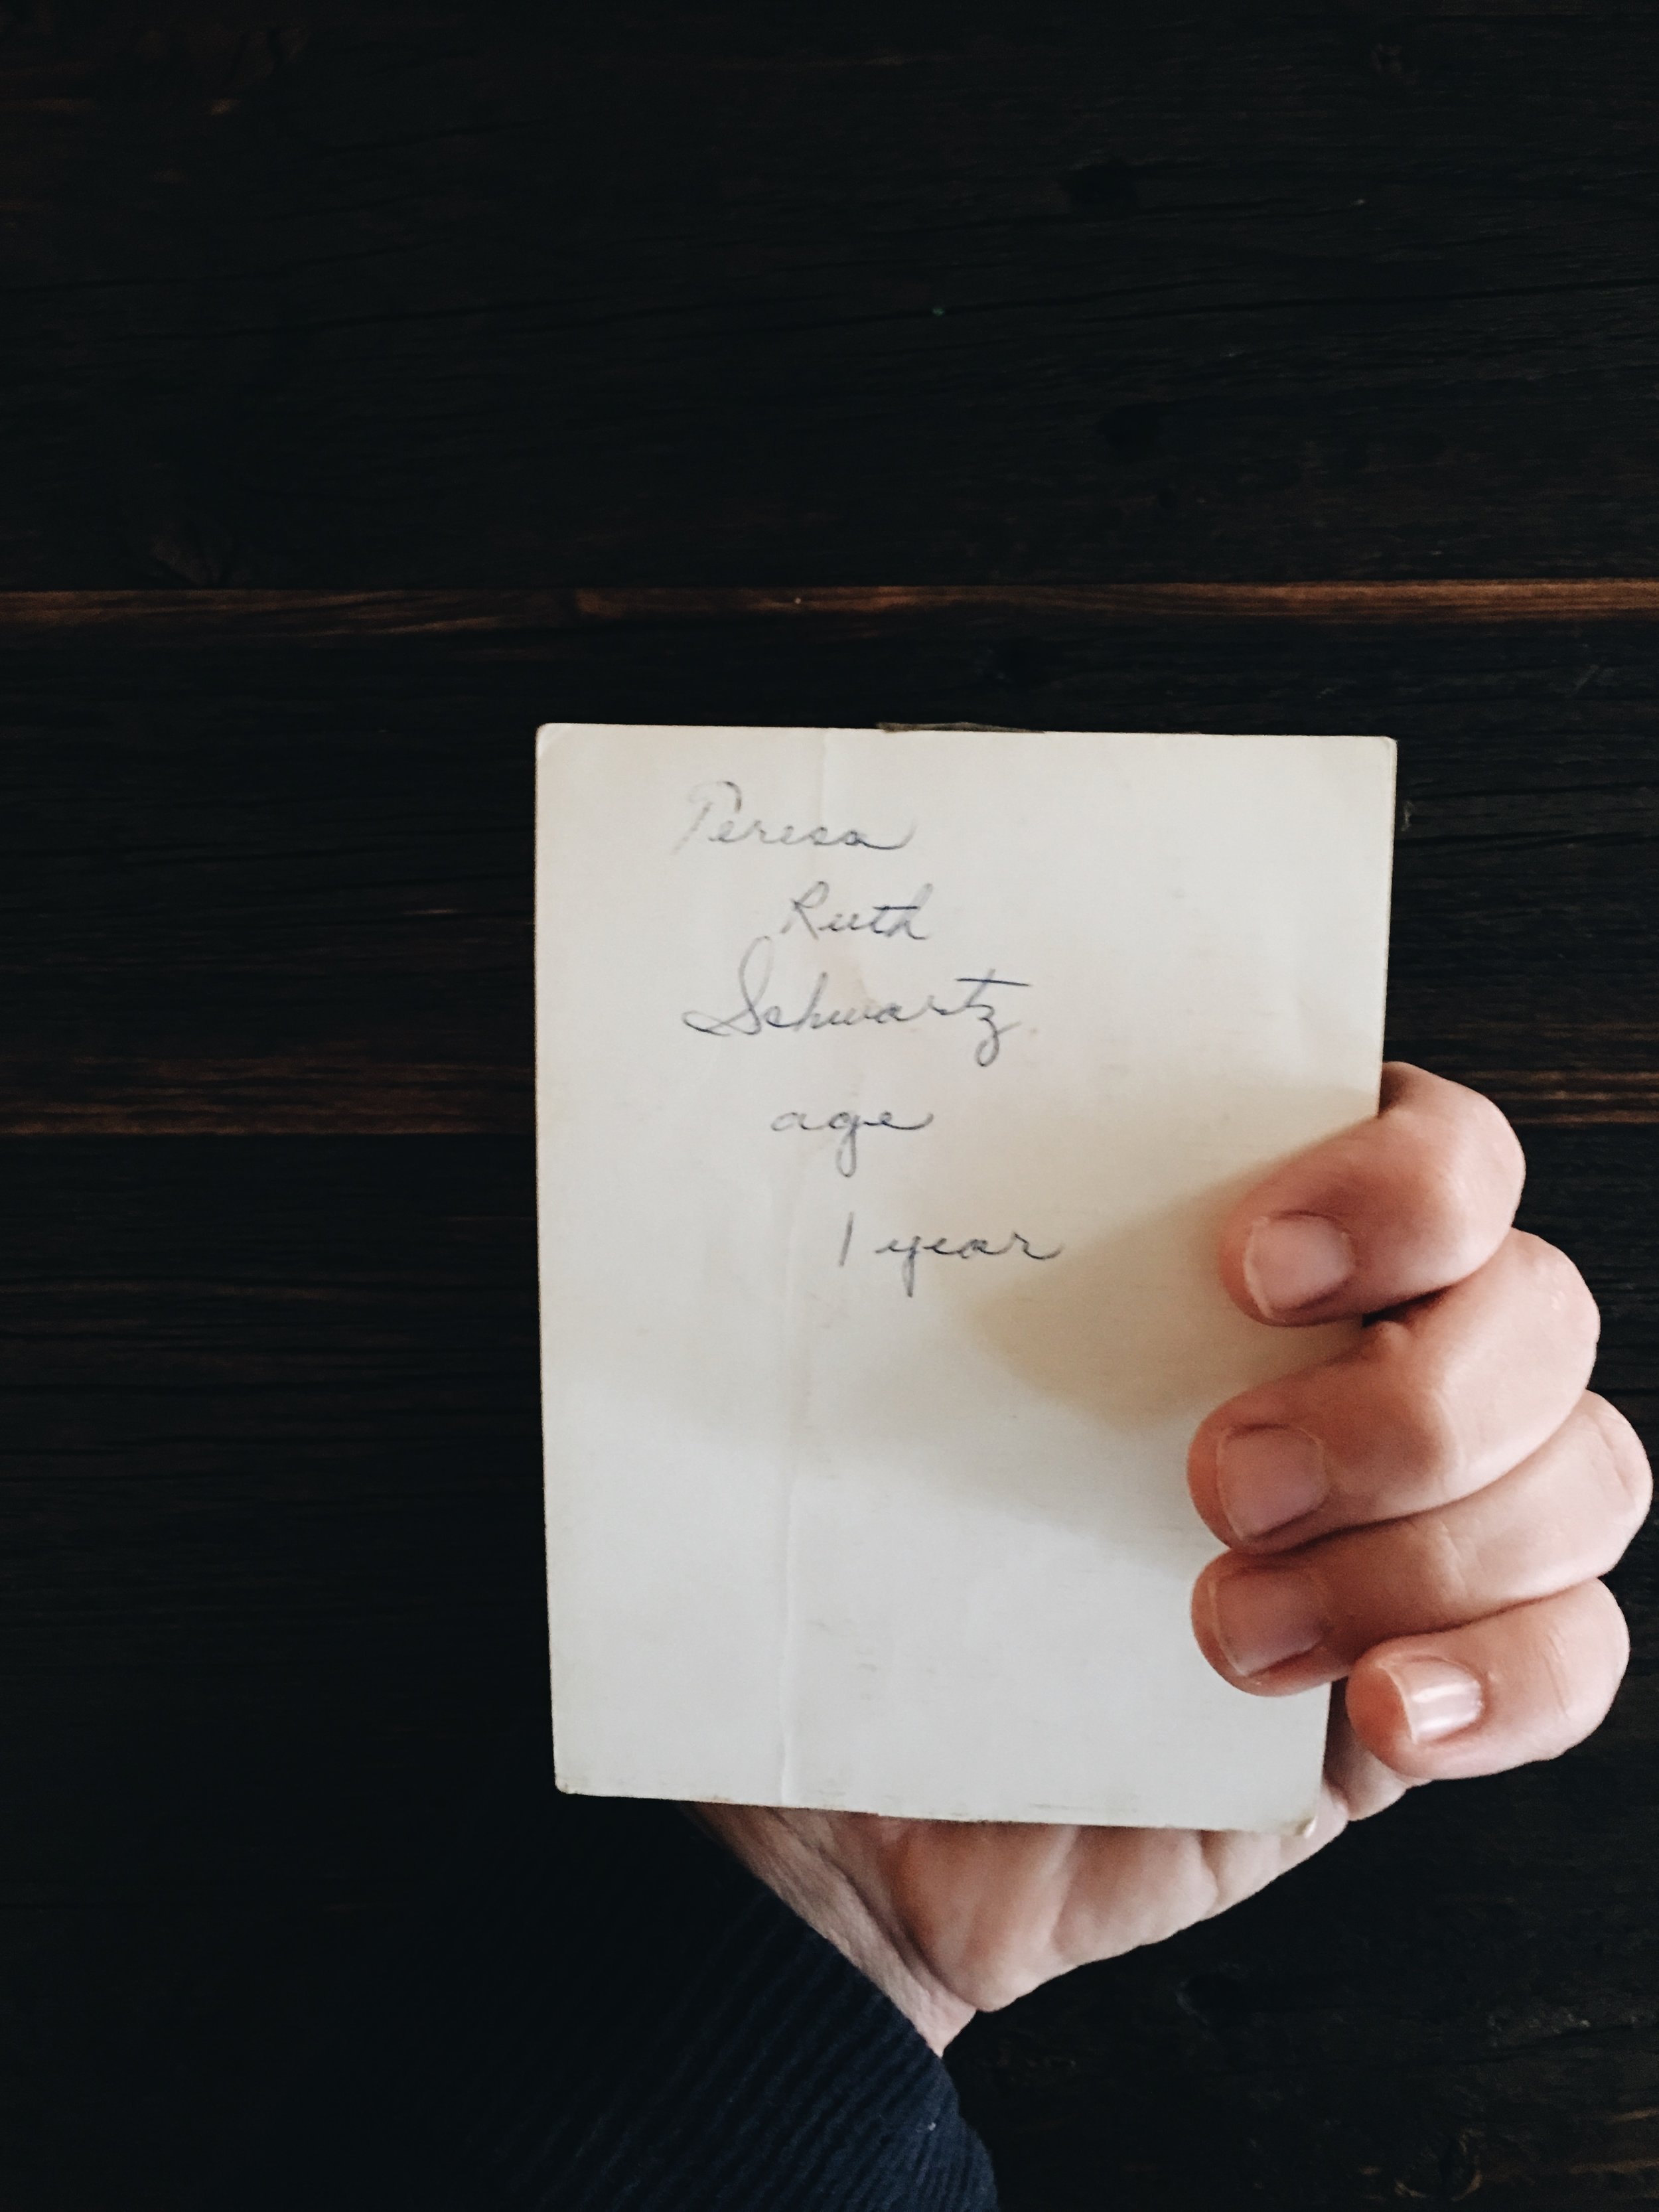
It's always nice when the old photos have information written on the back!
Once the photos are separated by decade begin to organize each decade pile into smaller, more specific time frames. I chose categories like infant hood, toddler hood, elementary, middle, high school, college years, etc. etc. As I began grouping this way my memory became a little better and I could figure out the years. Stash each pile into a ziplock bag and use a 3x5 notecard to write the range of years (approximate).
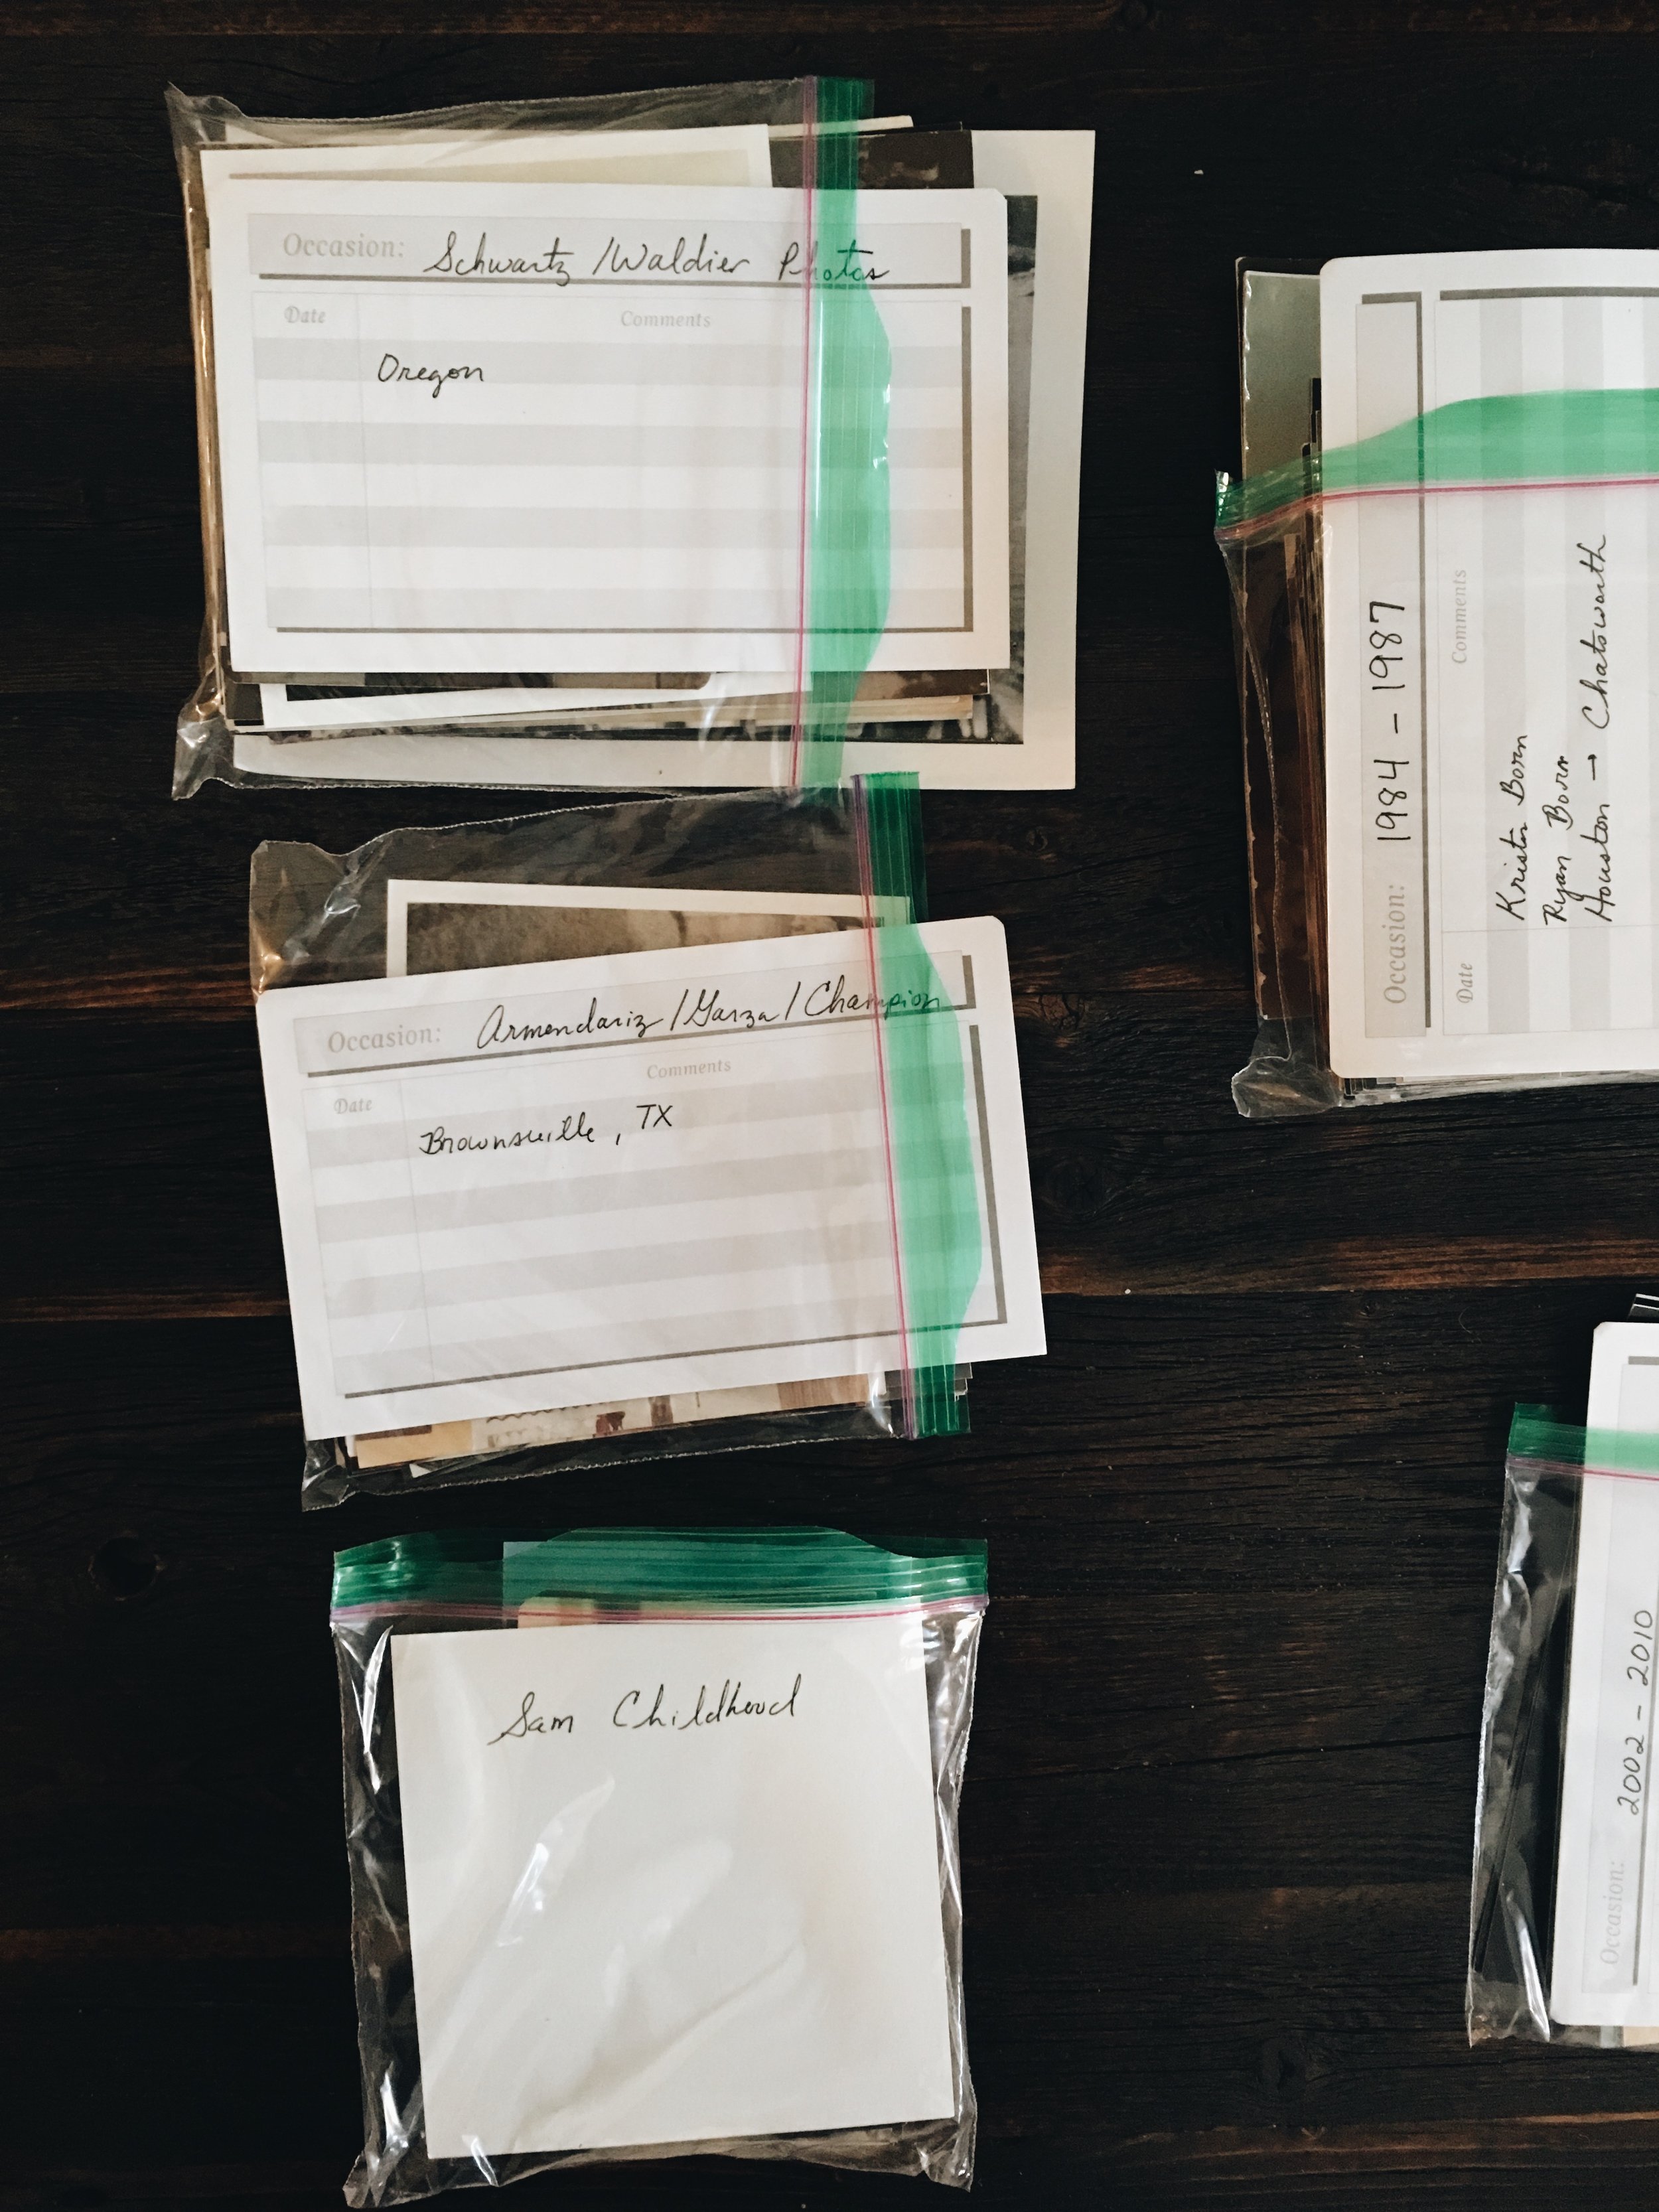
For older photos we grouped them by specific sides of the family. Once we have time we will go back and do more specific ordering.
Once a week grab a bag and write a little note on the back of the photos (name the people in the photo and any other details). We'd recommend writing on a sticky label and then sticking it to the back of the photo (this will prevent smudging and bleeding).
Your children/grandchildren will appreciate this one day. Be as specific as you can with details (dates, names, location, description). If you're feeling extra motivated, and if your memory is extra sharp, begin to order the photos in each bag by dates. Once a bag is complete it's ready for an album or shoe box. An album is the best way to keep your photos in order and in best condition.
Now when your mom brings over a few photos of you from your 7th grade talent show you know exactly what to do with them!

For now all of the bags are stored in a basket.
Our favorite photo album can be purchased here on Amazon.

Our hardwood photo rails are a fun way to display your favorite photos, and easy to update! Once your photos are organized you can change up your photo rails more easily. Fill the rails with photos of your little one on their birthday, then switch out the photos for Father's Day, etc.
We’ll tackle the digital photos next (the hard part)! Stay tuned for Step Two, and have fun going through all of your photos! Break out the coffee and cookies and make it a family event!
Also, browse our photography board for more tips and ideas!